
Lower your internet bill
61% of people overpay for their internet.
Are you one of them?
Unlock exclusive offers in your area!
Call now
[tel]Enter zip code
Are you happy with your Internet service?

About the author
Imagine losing the video of your baby’s first steps forever.
Your laptop crashes. Your phone gets stolen. Your external drive mysteriously stops working. Suddenly, years of irreplaceable family memories—first words, birthday parties, Christmas mornings—vanish without a trace. The cloud backup you thought was protecting everything? It stopped syncing months ago, and you never noticed.
Don’t let this heartbreak happen to you.
Every day, families lose thousands of digital memories because their files are scattered across dying hard drives, forgotten USB sticks, and unreliable cloud services. You probably have your own horror story—the wedding photos trapped on an old phone, the family videos buried somewhere on a laptop that won’t start, or the important documents you can never find when you desperately need them.
Your memories deserve better than this digital chaos.
Setting up a home Network-Attached Storage (NAS) system isn’t just about organizing files—it’s about protecting the moments that matter most. It’s about never again experiencing that sinking feeling when you realize precious memories might be lost forever. Think of it as building a digital fortress around everything you hold dear, accessible from anywhere in the world but completely under your control.
Never lose your memories
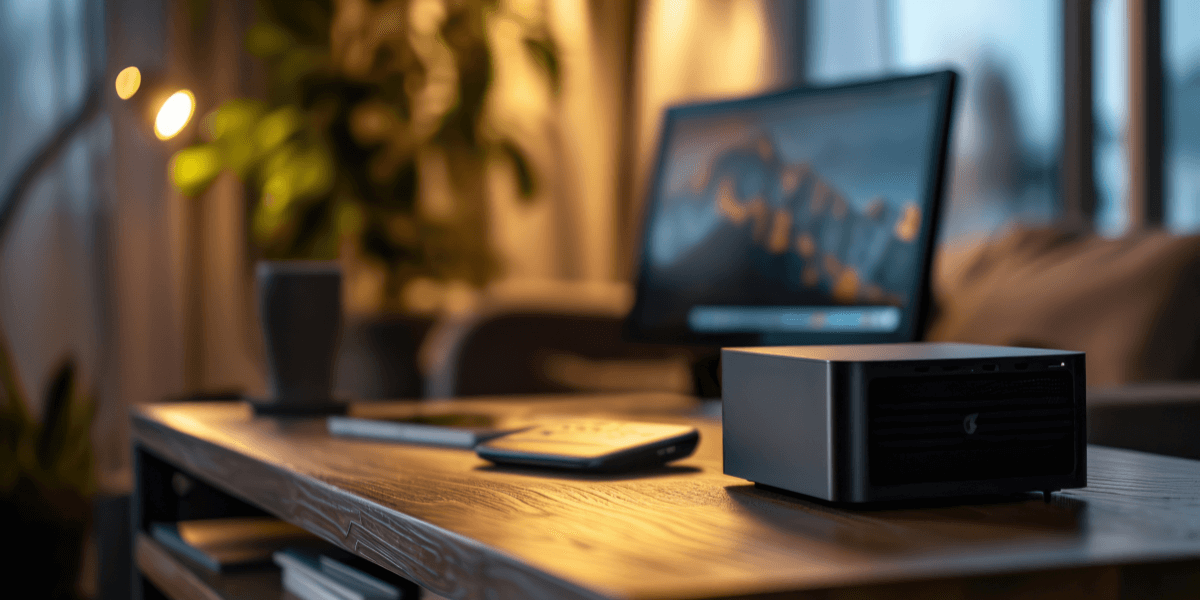
Network-Attached Storage (NAS) is essentially a dedicated file storage solution that allows multiple users and devices to access data from a central location. Unlike traditional hard drives that connect directly to one computer, NAS devices are connected to a network, making your files accessible to every device in your home—and beyond.
Today’s families generate massive amounts of digital content. High-resolution photos, 4K videos, work documents, and media collections quickly overwhelm individual device storage. Most people resort to a patchwork solution: some files on laptops, others on external drives, important documents in various cloud services, and family photos scattered across different phones.
This approach creates several problems:
A well-configured home NAS eliminates these headaches by providing:
Centralized Storage: All your files live in one secure location that every authorized device can access. No more hunting through multiple drives or wondering which computer has the file you need.
Automatic Backup Protection: Modern NAS systems often include built-in redundancy through RAID, which helps protect against data loss in the event of a drive failure. Your precious family memories stay safe even if the hardware fails.
Remote Access: Access your files from anywhere with an internet connection. Whether you’re at work, traveling, or visiting family, your data travels with you securely.
Media Streaming Hub: Stream movies, music, and photos to smart TVs, gaming consoles, tablets, and other devices throughout your home without needing a dedicated computer running.
Privacy and Control: Unlike cloud services, you maintain complete control over your data. No monthly fees, no privacy concerns, and no risk of service shutdowns.
Scalable Growth: As your storage needs expand, most NAS systems allow you to add drives or upgrade capacity without requiring a complete system replacement.

The NAS tiers
Choosing the right NAS involves understanding the different types available and matching them to your specific needs and budget.
Ideal for individuals or small families just starting out with centralized storage. Two-bay NAS systems provide data protection through redundancy without requiring excessive technical complexity. These systems typically cost between $200-400 before drives and work well for:
The sweet spot for most families and home power users. Four-bay systems offer an excellent balance between functionality and affordability, providing room for growth. These systems typically cost $400-800 before drives and excel at:
For serious enthusiasts, content creators, and power users with extensive storage needs. These systems cost $800-2000+ before drives but offer enterprise-level features:
Setting up your home NAS involves several key phases, from initial hardware assembly to final configuration and testing.
Verify all components are present, including the NAS enclosure, power cables, Ethernet cable, and any included accessories. Install any RAM or expansion cards, if necessary.
Carefully install your NAS drives following the manufacturer’s instructions. Ensure drives are securely seated and all connections are firm.
Determine the placement for your NAS bay, taking into account the location’s effect on wireless signal strength throughout your house. Choose a location that’s:
Use an Ethernet cable to connect the NAS to your router. If preferred, connect the NAS directly to your PC. For best performance, use high-quality Cat-6 or Cat-7 Ethernet cables.
Power on your NAS and wait for the initial boot sequence to complete. Most modern NAS systems provide multiple ways to access the setup interface:
It is a huge security risk to leave the default username and password enabled. At the very least, you must change the default password. Create strong, unique credentials for your administrator account.
Assign your NAS a static IP address to ensure consistent access. If the NAS manufacturer recommends it, assign a fixed IP address on your local network for the appliance. This prevents the IP from changing and breaking network shares.
You’ll need to create a storage volume to store the contents of your NAS when you boot it up for the first time. Access your NAS storage management interface and:
Once your RAID array is built, create logical volumes and shared folders:
For each user in your home, office, or team, create an account on the network-attached storage. Set up individual accounts for:
By adding user accounts, you can control folder access and storage limits. Implement a permission structure that balances security with usability:
Set storage quotas for individual users to prevent any single person from consuming all available space and to encourage good digital housekeeping habits.

Update all passwords
Securing your network-attached storage is critical. A compromised NAS can expose all your personal data to cybercriminals.
Weak and easily guessed passwords remain the top cybersecurity vulnerability for NAS systems. Implement these authentication best practices:
There’s not much you can do when a server has a known vulnerability other than to install the latest security update that fixes it. Configure automatic updates for:
Your NAS is on your network, so the security of your network impacts the security of your NAS. Ensure your network infrastructure is secure:
One of the biggest advantages of a home NAS is the ability to access your files from anywhere in the world. However, remote access must be configured carefully to maintain security.
The most secure method for remote access involves setting up a Virtual Private Network (VPN) connection to your home network. This approach keeps your NAS hidden from the public internet while providing secure access.
VPN Setup Options:
Benefits of VPN Access:
Most NAS manufacturers provide mobile apps and desktop applications that simplify remote access while maintaining security:
Setting up a home NAS might seem daunting at first, but the benefits far outweigh the initial learning curve. You’ll gain complete control over your data, improve family productivity, and create a robust foundation for your digital life that scales with your needs.
The key to success lies in starting with a clear understanding of your requirements, selecting high-quality components, and implementing effective security measures from the outset. Remember that your NAS will evolve with your needs—what starts as simple file storage can grow into a comprehensive home automation and media center.
Your new home network-attached storage is only as powerful as the internet connection behind it. Remote access, cloud backups, and streaming to multiple devices all depend on having reliable, high-speed internet service. Don’t let a slow or unreliable connection become the bottleneck that limits your network-attached storage’s potential.
Enter your zip code here to discover the fastest internet plans and exclusive deals available in your area. Compare speeds, prices, and features from top providers to find the ideal internet service that keeps your digital life running smoothly.
[1] Massive.io. “How to Set Up a NAS"
[2] Techtarget.com. “How to configure a rack-mounted NAS in 10 Easy Steps"
Do you want to leave a review for AT&T Internet?
About the author
Infinity Sales Group, LLC
5900 Broken Sound Pkwy NW,Boca Raton, FL 33487